


- Instead of "blocks" we are going to base this on triangles. I used 12" triangles, which is made IMMENSELY easier by this ruler. It is a little pricey, but if you plan on working with 60 degree triangles again in the future, it is well worth it. The ruler is amazing. To plan your triangles, you can make up a grid of triangles in Photoshop or you can print one here.
- Forgive my amateur Photoshop skills. I considered each small triangle as 2" and then drew in the larger triangles. But instead of placing them in an even grid like this:

I offset the diagonal columns.

I think this is more interesting. Since you are going to assemble the diagonal columns, you could offset them in different ways.
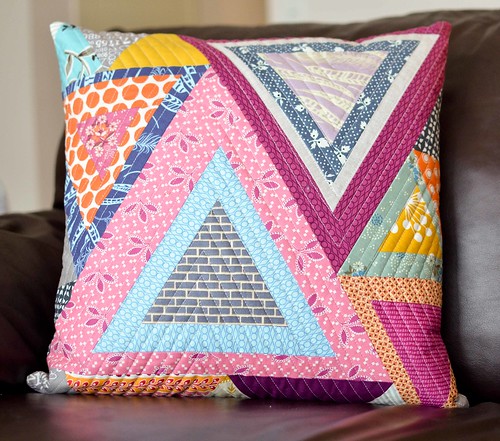
Each of these 12" triangles can be made however you want. It can be one piece of fabric, it can be log cabin triangles, or it can be composed of smaller triangles.
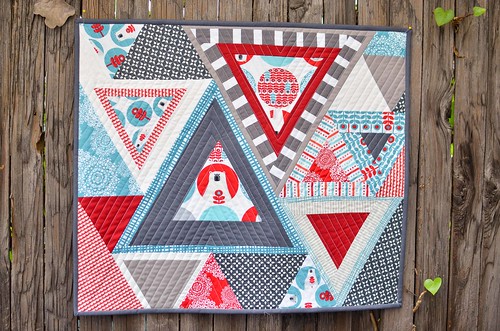
I wanted to make a mini quilt, so mine is smaller, but here is my mockup.

The darker black lines mark my 12" triangles.
To make the smaller triangles, it is easy to tell how big to make them since the smallest triangles are 2". The triangles that have 4 small triangles on one side should be 8" (8.5" unfinished), the ones with 3 triangles on one side should be 6" (6.5" unfinished), etc.
If you want to do log cabins, it is really easy. Just add a strip, trim, add a strip, trim, etc. You can also add strips of different widths (like I did here) to make the triangle off center.

Once your triangle is larger than 12.5" on each side, you can "triangle" it up.

If you don't have a triangle ruler, you can use the 60 degree line on another ruler. Just line up the 60 degree line with the bottom of your triangle, and trim along the long side.

Once you have all of your triangles made, lay them out . . .

And then separate them into their 12" triangles. You will want to sew them together in these groupings to avoid having to do any Y seams.

Within the triangles, sew together the smaller pieces first and work up to the bigger pieces. When you have all of your 12" triangles sewn together, sew them into diagonal columns.

And then sew the columns together. You should now be able to trim it to your desired shape. See, not so bad, right?
I have never written a tutorial before, so I am not sure if this was thorough enough. Let me know if you have any questions!
ETA: I just saw this tutorial by Faith at Fresh Lemons Quilts which gives directions on cutting equilateral triangles without a triangle ruler.


Makes sense to me Erica! It's too bad I'm so cheap when it comes to rulers because it appears that they really do make life easier!! ;)
ReplyDeleteThanks for the tutorial, and your mini with the Brrr! fabric is adorable.
Great job, especially for your first tutorial.
ReplyDeleteThat's really cool! Gonna have to give it a try.
ReplyDeleteI love this look!! Thanks for the tutorial. It looks great with the polar bears :o)
ReplyDeleteI love this! I'd never have thought to vary the size like you did! So awesome! I have it pinned for future reference! :)
ReplyDeleteoh my, i love this idea. i have until now stuck with squares, but i think i might give these triangles a go. great tutorial :) cheers
ReplyDeleteVery cool process! Thanks for sharing about the rulers... I haven't seen those!
ReplyDeleteI LOVE it! Nice job. Very easy to follow. I love your fabric choices!
ReplyDeleteI LOVE it! Nice job. Very easy to follow. I love your fabric choices!
ReplyDeleteHi, I don't know if you'll see my question, since I'm posting so much later, but I thought I should try :) the ruler that you make reference to no longer shows up when the link is used. Could you give the name of the ruler so I can search for it? Or perhaps you are aware of another one like it, if that one is no longer available? Perhaps I should just look for sixty degree rulers, hmm. I'll try that. I appreciate that you have included how to use the sixty degree line but, since you said having the ruler was really helpful, that sounded good to me! I love both of your examples! Beth
ReplyDelete